Email courses are all the rage right now and for good reason. Free email courses are a great way to build the “know, like and trust” factor with your audience.
So, naturally, I jumped on the course bandwagon and finally completed my free Pinterest for Business 5-day email course this month.
I have been working on this course for months and it felt amazing to check that box off my to-do list. Driven by my desire for perfection, I delayed far too long in completing the course. I listened to Podcasts, watched webinars and read blog posts all about course creation.
(2018 Update: The Pinterest for Business email course is now closed and has been replaced with the Pinterest Traffic Trifecta Masterclass. The 5 steps outlined in this blog post still apply and will be helpful if you want to create your own free email course.)
Please note this post may contain affiliate links and I may earn a commission if you click them and make a purchase. This is, of course, at no cost to you, and I only share products that I use and love myself. Please read my disclosure for more information.
Virtually every course creator I found promotes the exact same tools – LeadPages, ConvertKit, and Teachable. All three are outstanding tools and provide lots of value. There’s just one problem. If you’re a brand new business owner or blogger, these tools will cost you around $100 per month to get started.
As your list grows and your needs expand, you’re looking at $200 – 300 per month. I don’t know about you, but as a brand new business, I’m not willing to drop $100 per month to deliver a product I’m providing to my audience for free! That’s not good business sense.

Many successful entrepreneurs will advise you to think like a six-figure business and make investments like a six-figure business. I’m going to tell you that’s a bunch of crap. You need to think like a strategic business and make smart investments that will sustain the life of your business. You need to be a strategic business & make smart investments that will sustain your business.
As a brand new business generating no (or minimal) cash, it is not sustainable to bleed out hundreds of dollars every single month. Period.
Well, I take that back. Unless you’re a trust-fund baby with unlimited resources. If that’s you, knock yourself out. Spend like crazy on all the cool tools and software you can find. Everyone else, keep reading.
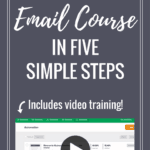
In this blog post, you will learn five simple steps to create and launch your email course using completely free tools – without compromising quality. The set up is simple and your course will look professional.
Before I outline the five steps, I want to show you a cost comparison between the traditional method using paid tools and my super-savvy method using free tools. Take a look at the breakdown.
| TRADITIONAL METHOD | SUPER-SAVVY METHOD | |||
| Landing Pages | LeadPages | $25/month | Create own on website | $0/month |
| Email Automation | ConvertKit | $29/month | MailerLite | $0/month |
| Course Delivery | Teachable | $39/month | YouTube | $0/month |
| Total Investment | $93/month | $0/month | ||
At the lowest level of investment, the traditional method will cost you $93/month. My super-savvy method will cost you $0/month. (Assuming you already have a website) I think that’s worth repeating. ZERO DOLLARS PER MONTH! Are you ready to learn how it’s done?
STEP ONE: Create Your Email Course Content
You know your course topic, and you’ve created an outline of what you want to teach. Now it’s time to write a series of emails and record videos (if necessary). To complete this step I recommend the following:
Google Docs or Microsoft Word
The writing process involves a lot of drafts, reflection, editing, rewriting, etc. The process can be long and messy. Because of this, I recommend using a word processor to write your emails instead of writing them in MailerLite. This will enable a smooth editing process and save you loads of time in Step Three.
Cell Phone
I strongly recommend incorporating some form of video in your course. The lessons will provide more value and allow your audience to connect with you on a deeper level. No need for a fancy camera or microphone. You can create good quality videos with your smartphone. No need to invest in a tripod or lighting. Prop your phone with boxes and books and record on a sunny day in a room with lots of windows.
Pro Tip: Face the windows and turn off all other lights in the room. This will eliminate awful shadows and yellow light and give your video a beautiful, natural lit appearance.
SnagIt by TechSmith
For my course, I chose to create step-by-step video tutorials. I recorded my screen using SnagIt by TechSmith. SnagIt is a free download for Windows and Mac.
Audio-Technica Microphone
To capture audio for the tutorial videos I used the Audio-Technica microphone. This is a $60 microphone we purchased on Amazon a couple years ago for a different project. Before you invest in a microphone, test the ear-buds that came free with your phone. If the sound isn’t clear, then make the $60 investment.
STEP TWO: Upload Your Videos to YouTube
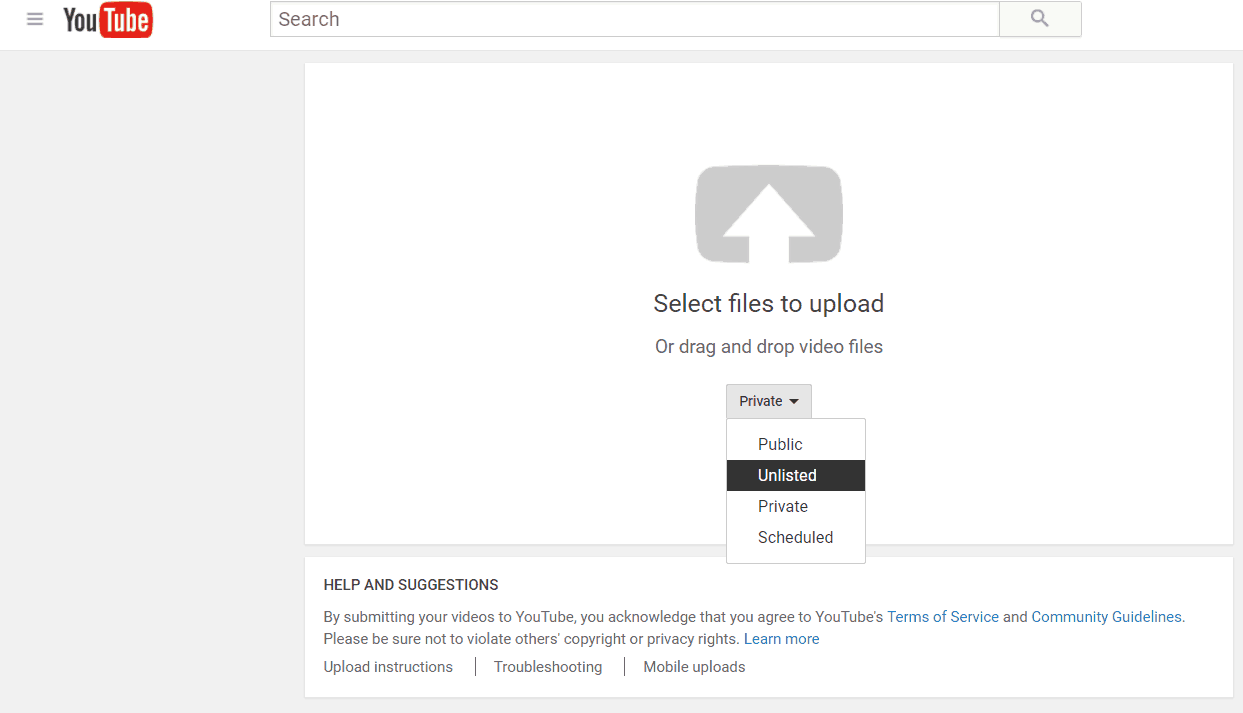
This step is quick and easy as long as you have a YouTube account established for your business. If not, you’ll need to create your account. When you upload your videos, be sure to select the “UNLISTED” privacy setting. Refer to the screenshot below. YouTube has three privacy settings for videos – public, private and unlisted. Google provides a quick description of each type as follows:
- Public videos and playlists can be seen by and shared with anyone.
- Private videos and playlists can only be seen by you and the users you choose.
- Unlisted videos and playlists can be seen and shared by anyone with the link.
The Private option is the best way to keep your videos from getting into the wrong hands, but it also requires you to manually give access to each person who signs up for your course. Trust me, you do not want to do this! Unlisted is by far the best option.
This does allow your students to share your video with others, but since when has sharing been a bad thing? That’s how content goes viral and you build followers!
To capture rogue viewers not enrolled in your course, be sure to include a sign-up link in the video description and reference the course throughout your video. If they stumble upon your video and like it, they might sign up to access the rest of the course.
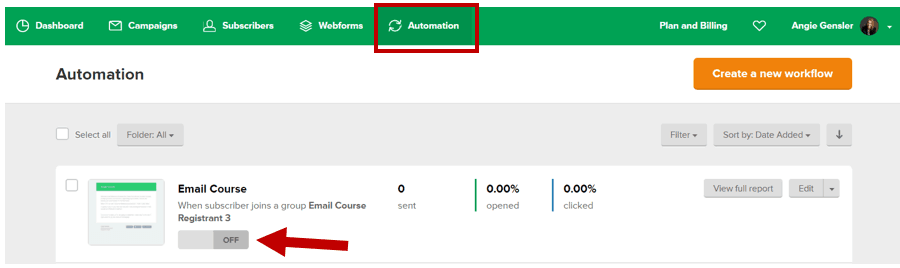
STEP THREE: Build Your Emails in MailerLite

MailerLite makes this step unbelievably simple. Throughout my 10+ years as a professional marketer, I’ve used numerous emails platforms. MailerLite is the easiest to learn and use. To get started, click here and create a free account (or log in to your existing account). Then, click “Automation” and “Create a new workflow.” (See image below)
Once you’re in the workflow builder you have a lot of options at your disposal. Watch the short video training to learn which options to select and how to build a workflow for an automated email course.
Once your workflow is built and your emails are loaded, hit the easy button and move on to step four.
STEP FOUR: Create Your Landing Page
My husband is a digital guru and tech geek. He builds my landing pages in WordPress – no 3rd party software required. According to him, anyone, not just tech geeks, can design their own landing pages. However, the amount of features and capabilities at your disposal depends on the theme you are using.
If you’re up for the challenge, I highly recommend creating your own landing pages on your website for two reasons. One: it’s free, duh! Two: all that traffic stays on your site. This racks up your analytics numbers and improves your sites overall SEO ranking.
Pro Tip: Visit the LeadPages templates page to get inspiration for your landing page design. Sort by “Conversion Rate” to find a high performing design you love.
Here are six best practices to follow when designing your own landing pages.
- Remove the site navigation menu
- Make your call to action large and above the fold
- Keep the copy simple – use bullets
- Include an image or video
- Utilize white space
- Include a contact information form

I want to address best practice number six – Include a contact information form. MailerLite provides the ability to create custom embeddable forms. For each landing page we build, we create a new “Embed Form” in MailerLite (see image) and add the piece of code to the landing page.
When a new subscriber fills out the form and hits the submit button, their information is automatically added to our MailerLite account in the list we designate. It’s a very seamless process and requires no additional integrations.
If you’re not up for the challenge of creating your own Landing Pages, MailerLite also has a landing page builder. It works similar to LeadPages but it’s included free in your MailerLite account. Have I mentioned yet how much I love MailerLite?
STEP FIVE: Turn On Your Course
Once your landing page is built, you need to log back in to MailerLite and flip the switch to turn your automation sequence “On.” (See image below)
Once you hit that “on” button, go grab a drink and relax. You deserve it! But, don’t get too comfortable. Once that drink is done, it’s time to get back to work and promote your course. A strong promotion strategy is crucial to the success of your course.
Ideally, you’ll spend more time and energy promoting your course than you spent creating it. For that reason, I’m going to reserve “how to promote your email course” for another blog post. For now, focus on creating your course.