Did you know Pinterest marketing can generate tons of traffic to your website? It’s true! Pinterest is not just for food, fashion, and fitness.
Pinterest is actually a powerful marketing tool every blogger and online business owner should learn to use.
If you’re an internet entrepreneur, you’re all too familiar with the constant hustle for more traffic.
No matter what your blog’s monetization strategy is, the more traffic you get, the more money you make.
But if you’re like me, you’re not willing to hustle non-stop for every page view and email subscriber.
And, you’re not comfortable risking thousands of dollars on Facebook ads. That’s where Pinterest comes in!
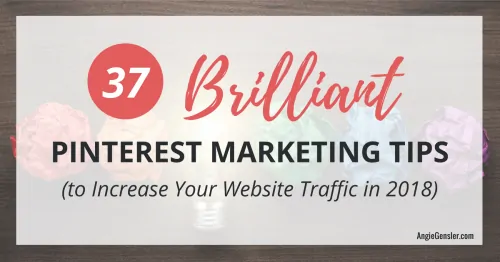
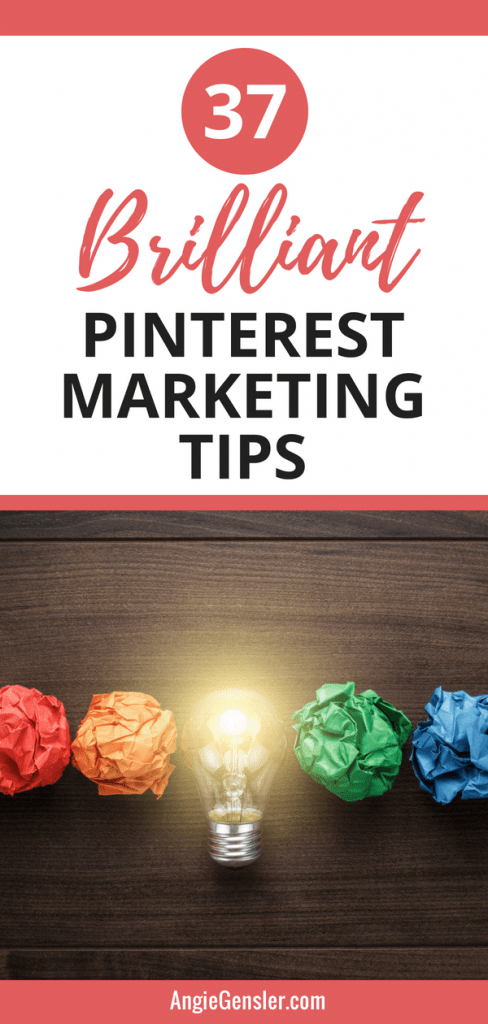
Pinterest is the perfect traffic source for bloggers and online business owners and in this article, I’m going to share 37 brilliant Pinterest marketing tips you can use to increase your website traffic in 2020.
Please note this post may contain affiliate links and I may earn a commission if you click them and make a purchase. This is, of course, at no cost to you, and I only share products that I use and love myself. Please read my disclaimer for more information.
These tips can be implemented immediately and most can be done quickly and completely free!
To help you out, I’ve created a free checklist you can download to walk through all 37 brilliant Pinterest marketing tips step-by-step.
You can use this checklist as your personal roadmap to increase your website traffic from Pinterest.

After you request to download the checklist, you may also want to Pin this post or bookmark it for later. It’s MASSIVE and filled with so much goodness, I know you’ll want to refer back to it over and over again after you’re done reading. OK, now that you’ve downloaded your free checklist, you’re ready to dig into the 37 Pinterest marketing tips. Let’s get started…
1. Create a Business Account
The absolute first step you need to take to market your business on Pinterest is to create a business account. There are four reasons you need a business account:
- Analytics
- Rich pins
- Promoted pins
- Buyable pins.
Did I just lose you? Check out this short video and I’ll explain each reason in more detail. When creating your Pinterest business account, you can either transfer an existing personal account into a business account, or you can create a brand new business account from scratch. There are pros and cons to each option, so be sure to watch this short video to help you decide which option is best for you.
2. Learn How to do Keyword Research on Pinterest
Most people think of Pinterest as a social network, but it’s actually more of a search engine. And like every other search engine, keywords are the currency of Pinterest. This means you need to learn how to conduct keyword research on Pinterest to ensure you’re using the right keywords on your profile and in your Pins. Once you’ve learned how to conduct keyword research and you’ve discovered the best keywords to help your business get found, you need to put them in the following places…
3. Add Keywords to Your Pinterest Profile Name
Your profile name is probably the most important piece of real estate on your business account. Many people make the mistake of putting just their name or their business name and miss an amazing opportunity to also include keywords. Including keywords in your profile name will help your account get pulled up when people search for those specific keywords.
PRO TIP: Use the bar symbol “|” on your keyboard to separate your name from the keywords.
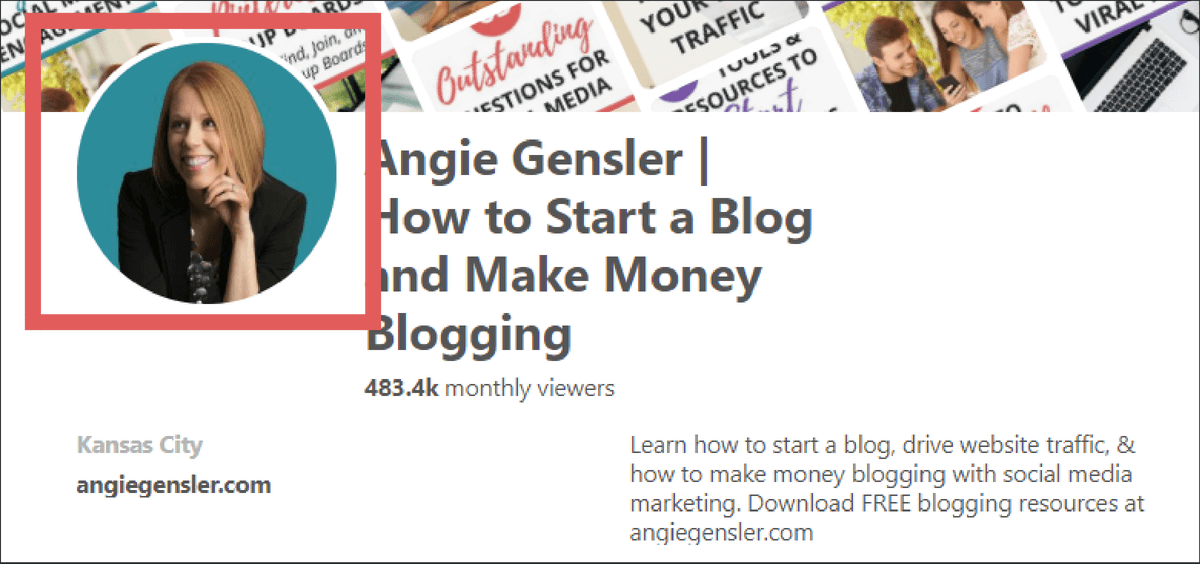
4. Add Keywords to Your Pinterest Bio

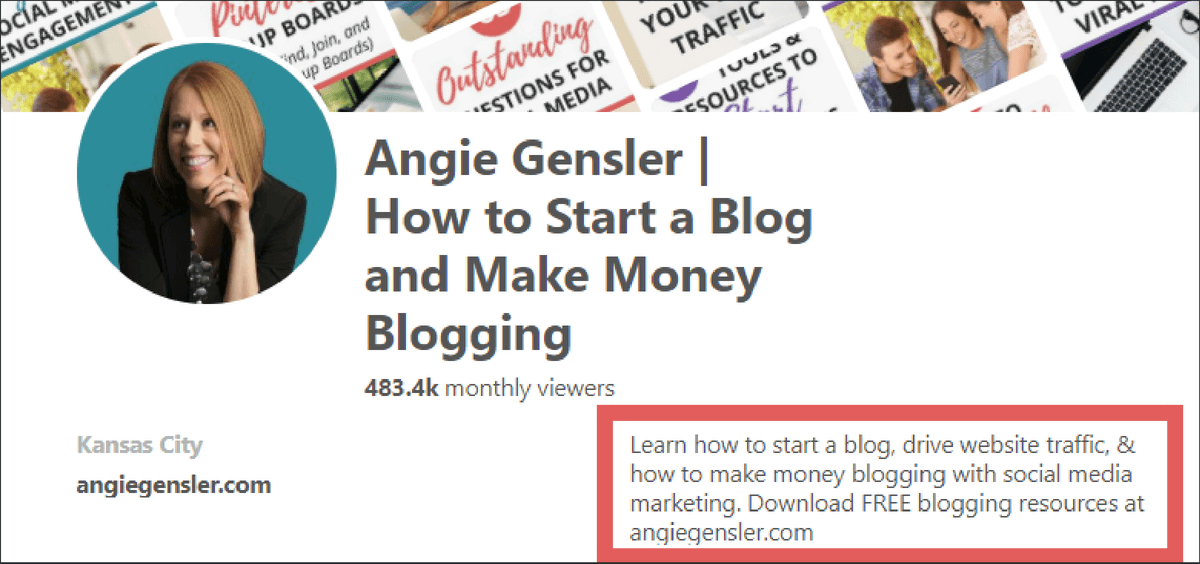
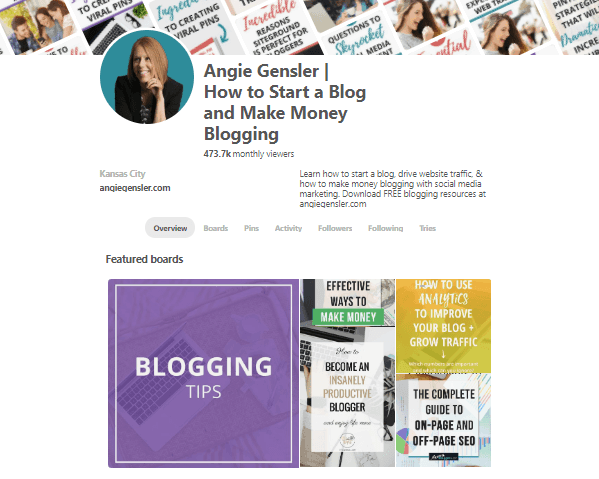
Pinterest gives you 160 characters to write a bio in the “About You” section. This can be accessed from your account settings. This is your chance to tell Pinners what you do and who you help, but it’s also important to includes keywords in your description as well. Not only do you want your bio to appeal to your ideal customer, but you also want it to appeal to the Pinterest algorithm so you pull up in the search results. Take a look at the example from my bio below. Notice how I was able to work in multiple keywords (start a blog, drive website traffic, make money blogging, social media marketing, and blogging resources) while still appealing to a human reader.
5. Add Keywords to Your Pinterest Board Names
Not only do you want your profile to pull up in search, but you want your boards and Pins to pull up in search results as well. A mistake I often see people make is to use puns or clever titles for their board names in an effort to give them some personality. Board names are not a place to use puns. It’s important to name your boards with keywords and keywords only.
PRO TIP: Create 10 – 15 boards relevant to your niche.
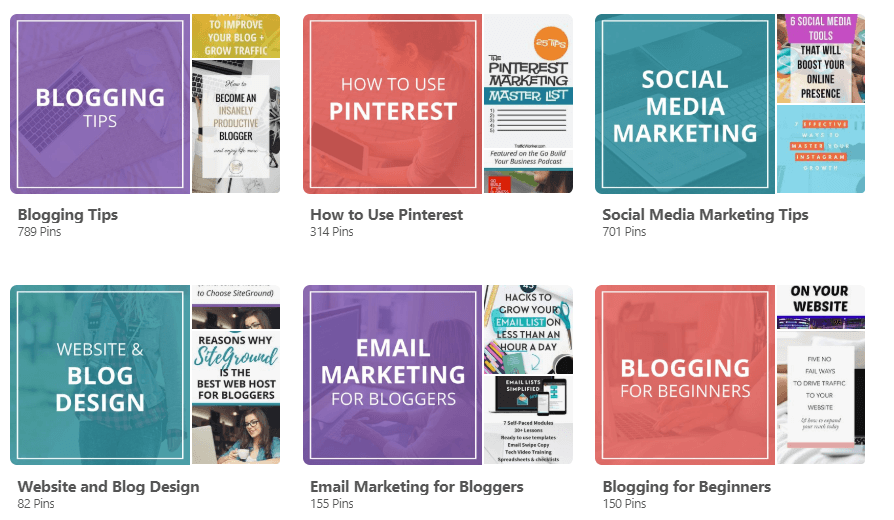
Also, when naming your boards, be sure to select a board category that relates to your board name. Pinterest also looks at the board category to get a better idea of what your board is about. Take a look at the example of my board names below. Each board name is actually something a Pinterest user would type in the search bar. Notice how I don’t go overboard and stuff the title with keywords. That’s where board descriptions come in…
6. Add Keywords to Your Pinterest Board Descriptions
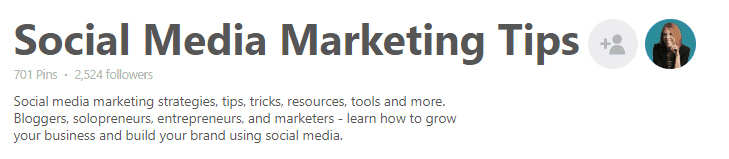
Board descriptions are your chance to put in as many keywords as you can but don’t go overboard. Take a look at one of my board descriptions below. It includes a lot of keywords to help the algorithm understand what it’s about, but it’s also written in a user-friendly way to help the actual human user understand if it’s a board they want to follow.
PRO TIP: Only Pin relevant content to your boards. Not only do keywords help your boards get found, but Pinterest’s algorithm also takes into the account the board name and description where a Pin lives. If you Pin irrelevant content to your boards it might not get distributed so only Pin relevant content to your boards.
7. Add a Call-to-Action in Your Bio
Now that we’ve covered keywords, let’s go back to your bio for a quick second. Make sure you include a compelling call-to-action (CTA) that drives them to your website or your online shop. If someone takes the time to read your bio, take that opportunity to drive them to your website where they will hopefully become an email subscriber and then a paying customer! My bio currently says, “Download FREE blogging resources at angiegensler.com” I can’t tell you how many experienced bloggers I see without a CTA in their bio. Sure, you want followers on Pinterest, but isn’t the ultimate goal to get them to your website and become a customer? If you don’t include a CTA leading them to your website, they’re likely not going to do it on their own.
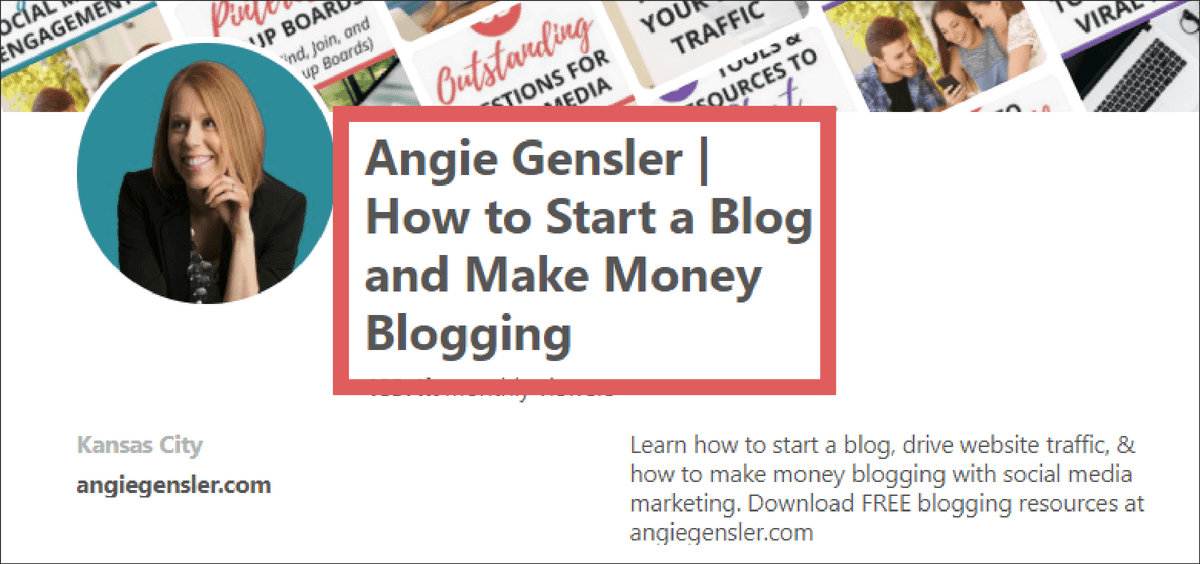
8. Upload a Great Profile Photo
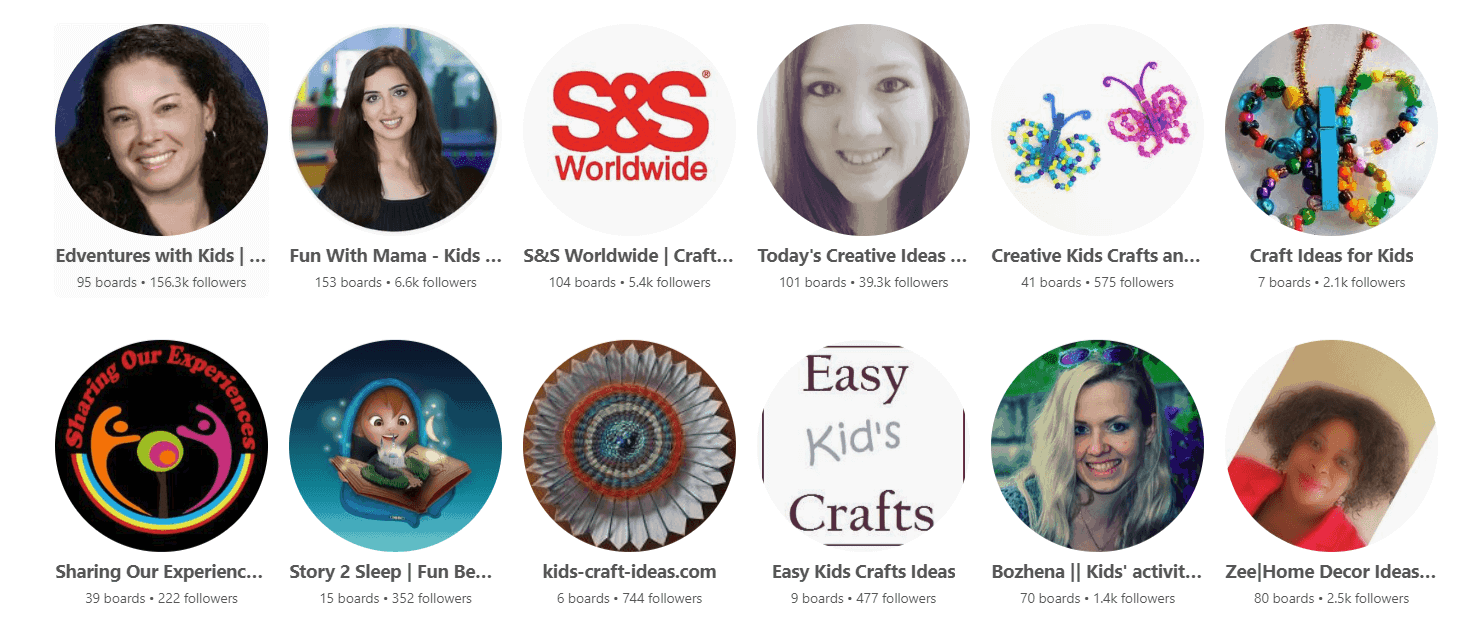
While Pinterest is a search engine, it’s also part social network, which means you want to attract followers. People want to follow people on social media, not faceless brands, so you want to upload a great photo of yourself. Avoid logos, drawings, or photographs of places or things. Instead, opt for a bright, crisp, and clear image of yourself – or a representative of your company. Take a look at the profile photos below from a people search I conducted for “kids craft ideas.” Which photos stand out to you and compel you to want to click and learn more about that person? The first two! Those bright, smiling (non-blurry) faces look trustworthy, friendly, and full of life. A handful of the other images are either blurry or look very amateur. If you’re on Pinterest for business reasons, you need to have a high-resolution, professional image.
9. Claim Your Website.

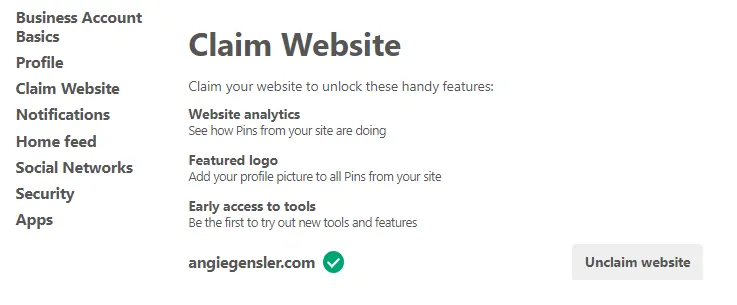
There are a couple of reasons you want to claim your website. First, once your website is claimed, your website address will be displayed and clickable on your profile, making it easier for people to navigate to your website. Second, you’ll get access to website analytics, which allows you to see what people are saving from your website. Claiming your website is fairly simple. Go into the setting for your account and scroll down to the “Claim Website” section. If your site is already claimed, you’ll see something similar to the image below. If your site isn’t claimed, you can click a button to guide you through the process. You’ll receive a custom line of code to add to the HTML of your website. Click here for more detailed instructions on how to do this.
10. Enable rich pins.
Rich pins add extra information from your website onto your Pins. There are four types of rich pins: app, product, recipe, and article. My Pins are all article rich Pins which means the headline and meta description from my blog posts are displayed on my Pins. Rich Pins also ensure that your details stay with the Pin as it spiderwebs throughout Pinterest. Even if a Pinner changes your original Pin description, your Rich Pin data will remain the same. Plus, if you ever update the blog post title or the meta description, all of your Pins for that blog post will automatically update! For help getting rich pins set up on your account, click here.
11. Create a Board for Your Blog Posts
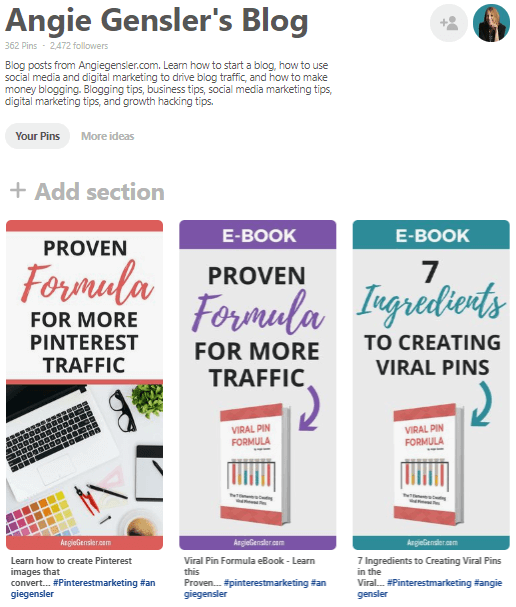
Your content can be Pinned to multiple boards, but you need to have one board dedicated to all the content from your website. Most bloggers name this board either with the name of their website or with their own name. For example, “AngieGensler.com” or “Angie Gensler’s Blog.” And don’t forget to include keywords in your description!
12. Create Your Profile Cover (Using Your Blog Post Board)
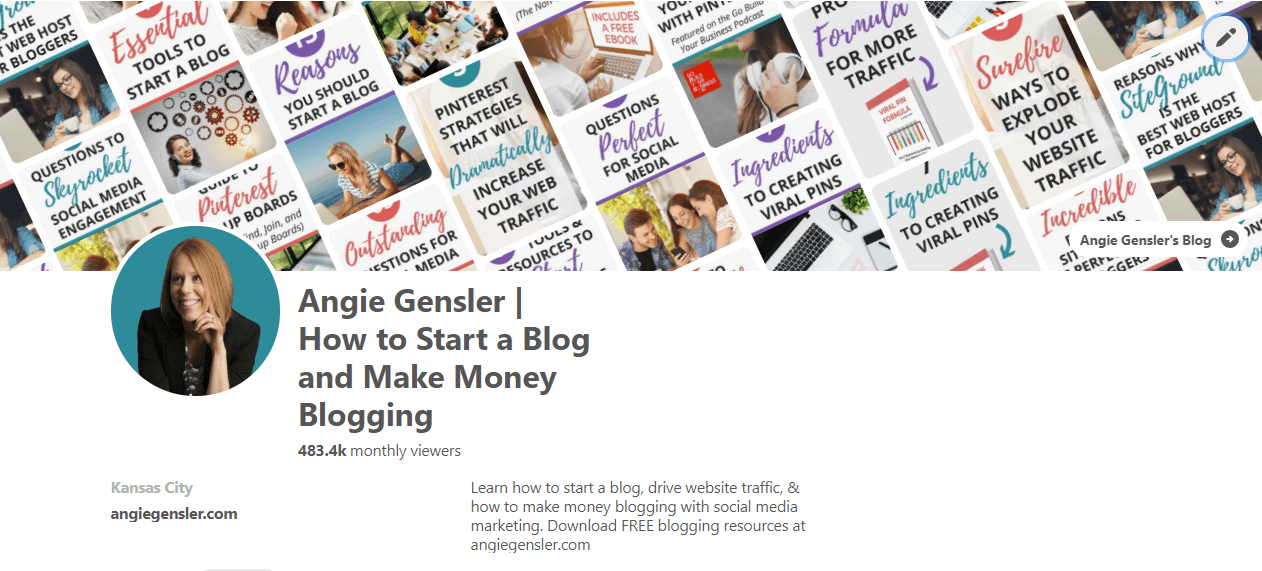
Once you’ve created a board to house content from your website, set that board as your profile cover. This will ensure that your profile cover represents ONLY content from your website and the images match your personal brand identity. To set your profile cover, click on the pencil icon shown in the top left corner of your profile (as shown below). This will pull up all of the boards from your profile, allowing you to select the board you want to pull Pins from to create your profile cover.
13. Fill Your Boards
Now it’s time to have some fun and start filling up your boards. You want to add a minimum of 30 Pins per board and you want them to be good Pins. Don’t fill them up with junk and don’t fill them with only your own content. You want to find high-quality content relevant to each board topic, from a variety of sources. Until your boards have at least 30 Pins, keep them secret.
14. Keep Your Personal Boards Secret
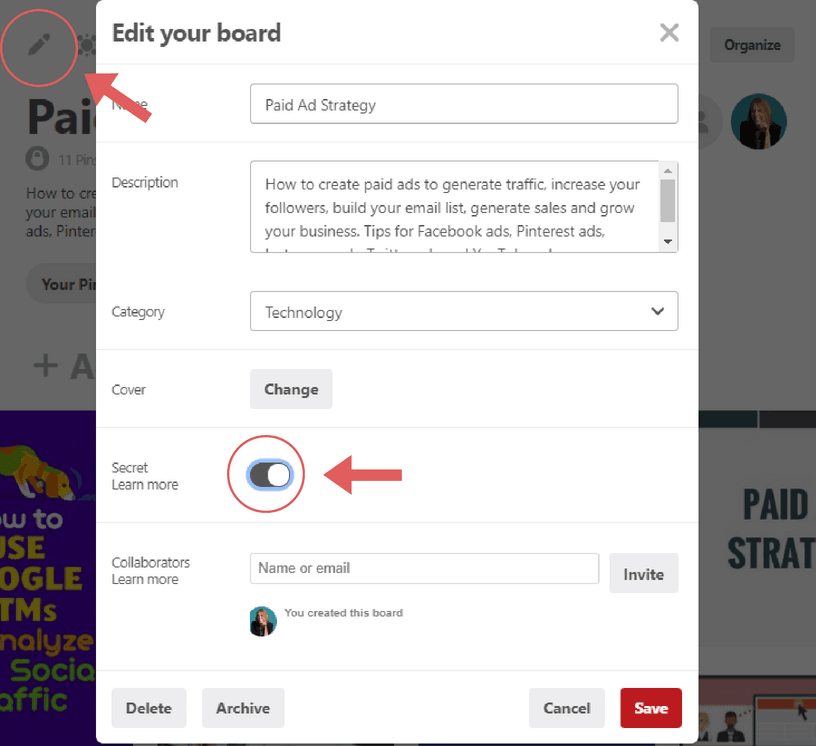
Speaking of secret boards, you also want to turn any personal boards, or boards not relevant to your niche, into secret boards. To make a board secret, click on the board and then click on the pencil icon shown in the top left corner. This will open up the “Edit your board” window. Click on the slider icon to make the board secret. This keeps the board from being seen by anyone who lands on your profile and it keeps the board out of search results.
15. Showcase Your Most Important Boards
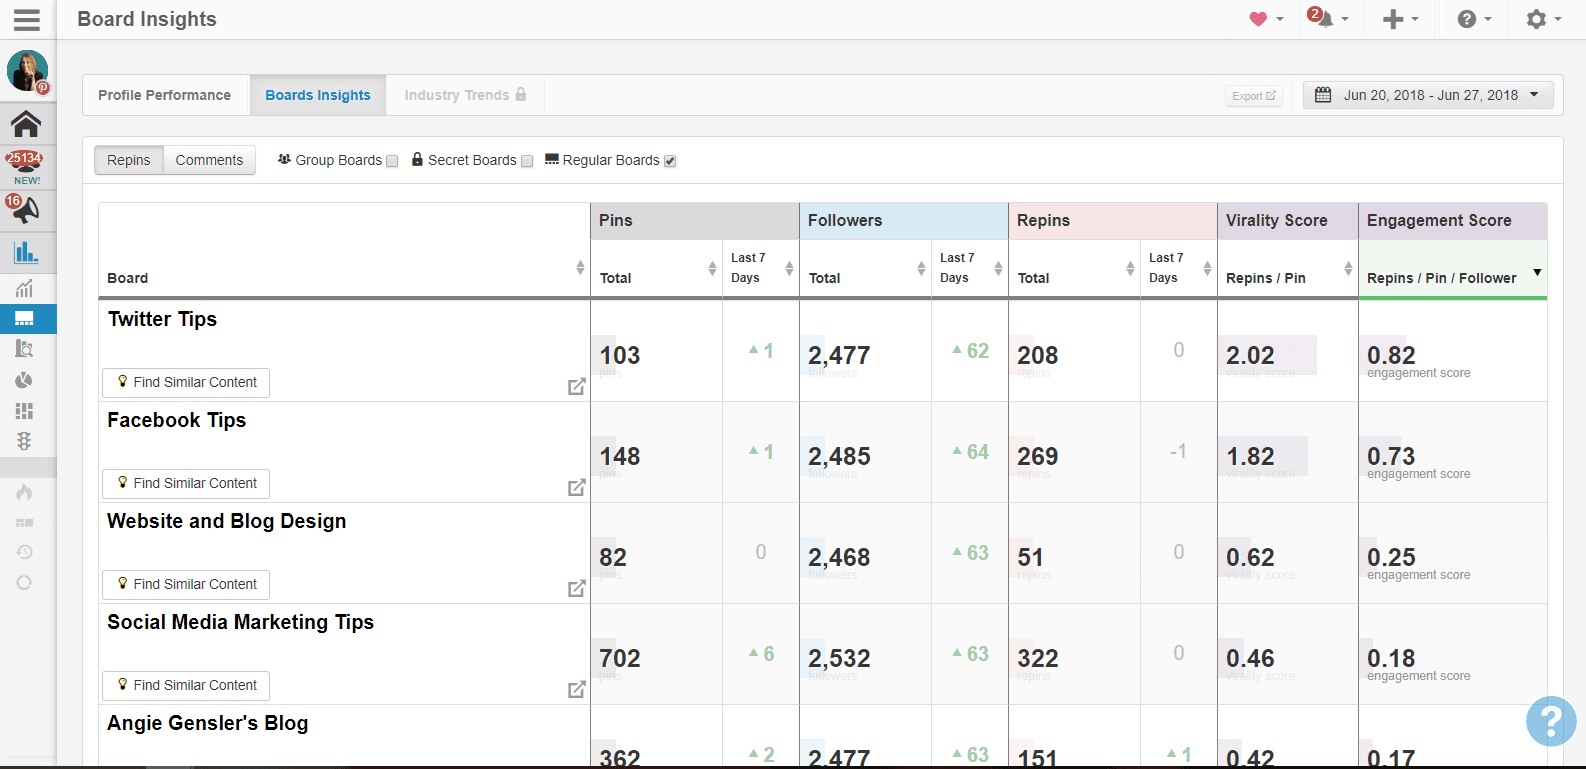
Once your boards are created and full of Pins, you’ll want to organize them to showcase your most important boards. You can easily move your boards around and place them in the order you want them displayed. Place your blog board first followed by boards you own in order of importance or engagement. If you use Tailwind, you can use the “Board Insights” feature to quickly discover which boards have the highest engagement. Pinterest also allows you to feature up to five boards on your profile. They will display on a scroller underneath your bio and before all of your boards and Pins. For your featured boards, select your own blog board first and then four of your top performing boards.
16. Follow Influencers in Your Niche

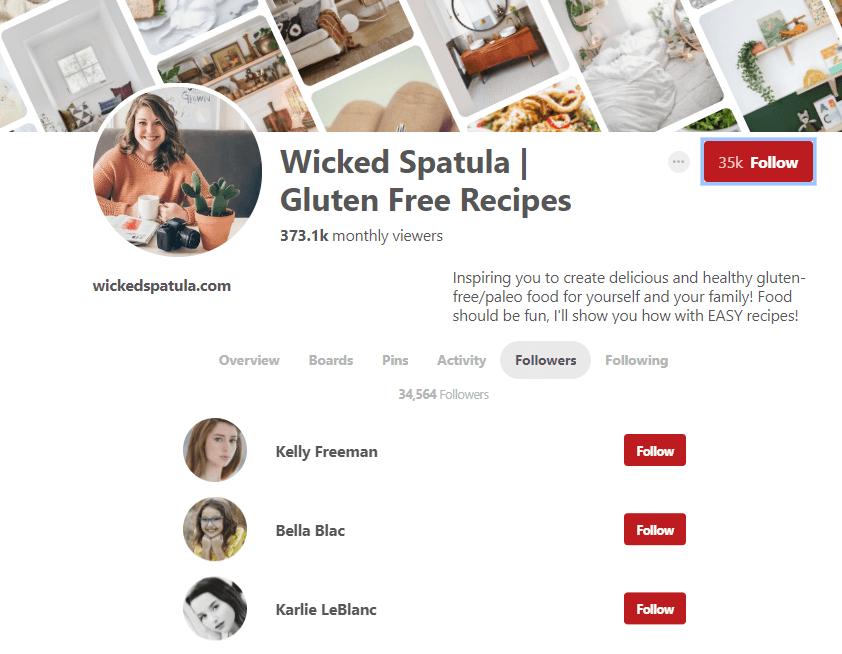
Once you’ve tackled the first 15 brilliant Pinterest marketing tips and you’ve built a strong foundation, you’re ready to build your followers. The first step to building your followers is to follow influencers in your niche or complimentary niches. You’ll need to do some research on Pinterest to figure out who is killing it in your niche and who has already built a large audience of your ideal customer. An easy way to do this is to search keywords you want to rank for, and then select “People” in the search filter. Instead of bringing up Pins about gluten-free recipes, you’ll see all the accounts with gluten-free recipes in their name or bio. (See why those keywords are so important?) Click through to the profiles with the biggest number of followers. If you like their profile and it seems like they share similar content to you, follow them.
17. Follow Influencers Followers
Here’s where the real magic comes in. Once you’ve found an influencer in your niche with a large audience, click on the “Followers” tab to see who is following them. Then, follow those people! You know they’re interested in that type of content, which means they’re likely to follow you as well. But, in order for this to work, it’s extremely important that you built a strong foundation and followed the first 15 Pinterest marketing tips outlined above. Your profile needs to be on point so it’s a no-brainer for these people to follow you back.
PRO TIP: Don’t got overboard with following or you’ll be marked as a spammer. Limit yourself to 30 – 50 per day.
18. Pin Approximately 30 Times Per Day
The number one question I get asked most often is, “How many times a day should I Pin to Pinterest?” While the ideal number varies for each person, 30 Pins per day is a good rule of thumb and the sweet spot I’ve discovered for my own business. Your ideal number of Pins per day will depend on the number of group boards you’re a part of and the engagement of your followers. You’ll need to test this and play around with different amounts varying from 10 Pins per day all the way to 100 Pins per day. I realize this may seem impossible to manage, but if you use a Pinterest scheduling tool like Tailwind, it can actually be done very quickly. Watch the short video below to learn how to use Tailwind to schedule hundreds of Pins in 5 minutes or less.
19. Pin Consistently
Pinterest’s algorithm wants to see that you’re active on the platform on a consistent basis. If you plan to Pin 30 Pins per day, make sure you do it EVERY. SINGLE. DAY. While this sounds extremely daunting and overwhelming, scheduling tools like Tailwind actually make it extremely easy! Watch the short video below to learn how to use Tailwind to create an optimized schedule for your Pinterest content – in seconds! Tailwind does all the work for you and uses data from your account to determine the best times and days for you to Pin content. To start your free trial of Tailwind and get a $15 credit, use my affiliate link to sign up.
20. Pin Other People’s Content
Many people recommend Pinning 80% other people’s content and 20% of your own content. I don’t agree with this advice as the whole point of Pinterest is to get your OWN content in front of people. But, you also don’t want to be spamming your followers or your boards with your own Pins. Plus, if you’re a part of group boards, you need to share Pins from those boards in order to keep the board engagement high, which affects the engagement score for your own profile. (I talk more about this in depth in my Pinterest Traffic Trifecta course.) I recommend you Pin about 50% of your own content and 50% of other people’s content.
21. Only Pin High-Quality Content
Whether it’s your own content or other people’s content, only Pin high-quality content. This means in-depth blog posts filled with valuable information. The best way to ensure the content is high-quality is to click through and skim it. This will add to the time it takes you to schedule your Pins in the beginning, but over time you’ll learn which bloggers create quality content every time. When I see a Pin from a blogger I know and trust, I don’t bother clicking through to check the post because I know they only produce high-quality content.
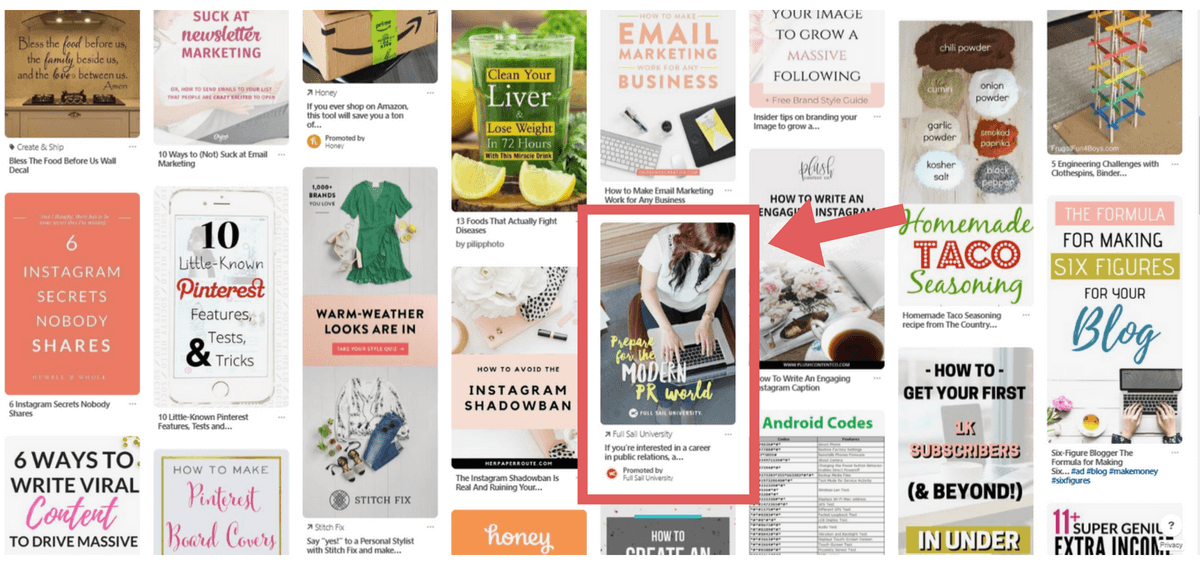
22. Design Long Pins for Your Content
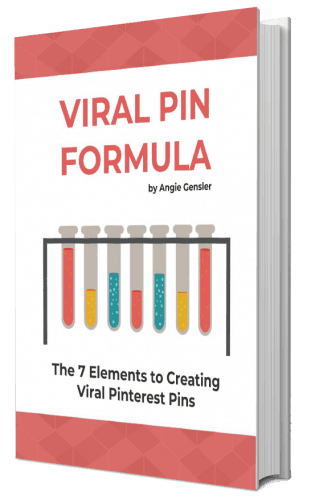
In order to add your own content to Pinterest, you need to design custom images. The better your image, the more engagement it will receive. I’ve studied hundreds of Pins over the past year and a half and I’ve identified 7 ingredients to creating viral Pinterest Pins. These 7 ingredients make up what I call the Viral Pin Formula. If you incorporate the Viral Pin Formula into your Pin designs, I guarantee you’ll get more clicks and saves. (Your Pins may even go viral!) One of those ingredients is to design long Pins. Pinterest recommends a 2:3 ratio for Pins, which means your Pins should be 1 ½ times longer than they are wide. (source) To learn all 7 ingredients of the Viral Pin Formula, grab your copy of the Viral Pin Formula eBook.
23. Create Multiple Pins for Each Blog Post
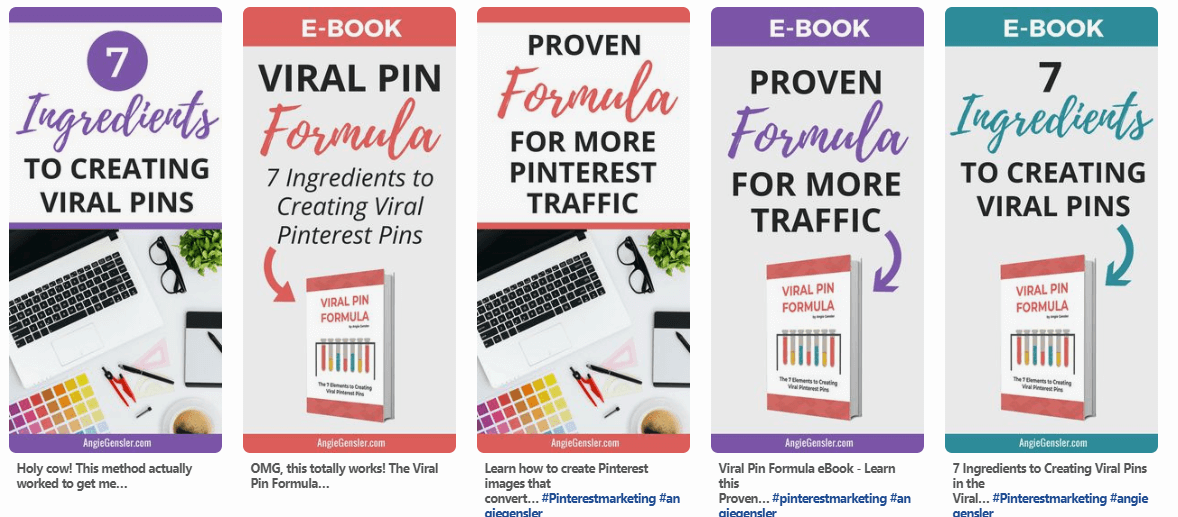
When you design your Pins using the Viral Pin Formula, make sure you design multiple versions. Try different colors, images, and a variety of headlines while still maintaining your overall brand identity. Look at the five different Pin designs I created to promote my Viral Pin Formula eBook. The Pins all lead to the exact same landing page, but I play with different colors, headlines, images, and design elements. You never know which design will appeal to readers, so it’s important to try multiple designs. Just make sure you create a unique description for each Pin. Pinterest encourages creators to add multiple Pins for one piece of content, and they recommend creating a unique description for each one as it will improve your SEO. (source)
24. Include Keywords in Your Pin Descriptions
SEO stands for Search Engine Optimization and good SEO is all about keywords. If you want your Pins to pull up in search results, you need to make sure you’re including keywords in your Pin descriptions. And because you’re designing multiple Pins for each blog post, you can test different keywords in each Pin description.
25. Include Hashtags in Your Pin Descriptions
Hashtags used to be a major no-no on Pinterest, but in 2017, Pinterest allowed content to be searchable by hashtags. You can add up to 20 hashtags in each Pin description, but I recommend using 4 – 5 hashtags in each Pin description, one of which is a brand-specific hashtag. For example, I add #angiegensler to every single Pin description to ensure my Pins show up if someone does a hashtag search of my name. You also want to make sure the hashtags are relevant and people are actually using. You don’t want to add a bunch of hashtags you made up and no one is searching for. There’s a special trick to finding relevant hashtags on Pinterest that I teach in my Pinterest Traffic Trifecta online course.
26. Include a Call-to-Action in Your Pin Descriptions
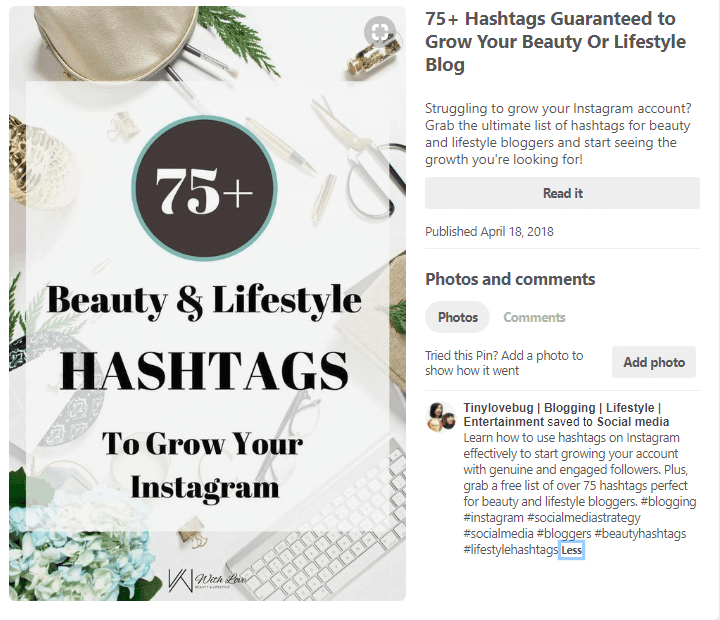
The ultimate goal of your Pins is to get clicks to your website. In order to get someone to click instead of just saving the Pin (or worse, doing nothing) you want to include a compelling CTA. The example above included a CTA in the Pin description to “grab a free list of over 75 hashtags perfect for beauty and lifestyle bloggers.” Other CTA examples include:
- Read this article to learn all 20 ideas.
- Click through to get the recipe.
- Download the free cheat sheet.
- Sign up for my free course.
27. Write Pin Descriptions as a Superfan.

Another great tip I learned from Rosemarie Groner is to write your Pin descriptions as a superfan. Instead of writing like the creator of the content and making it strictly about keywords, also include some of the actual benefits a user would get from the content. Just be careful not to overdo it and don’t write anything that isn’t true.
28. Hide Your Pins in Your Blog Posts
Remember tip 23 where I told you to create multiple Pins for each blog post? You want to make sure those Pins are included in your blog posts. This helps Pinterest know that your Pins are in fact leading to the correct source, and they’re not spam. But, you don’t want your blog posts jam-packed with your Pin images. That would look ridiculous and clunky. I embed one Pinterest image at the beginning of my blog post (this makes it easy for people to find a Pinnable image), and I hide the rest using a special line of code. To do this, add all of the images to the end of your blog post and then, in the text editor, add this line of code before the code for all the images:
Then, add this code after all the images: It sounds a little technical, but I promise it’s super easy once you get the hang of it.
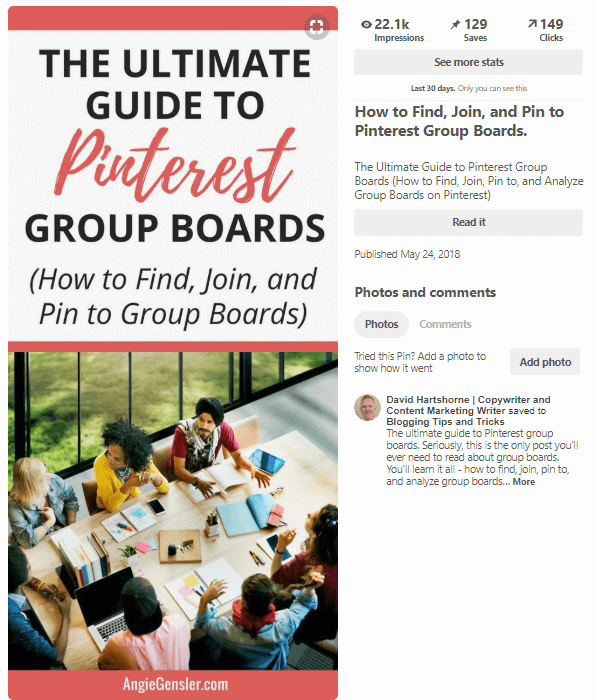
29. Join Group Boards
Pinterest group boards are a great way to expose your blog or business to a larger audience and drive traffic to your website. They allow you to leverage other people’s audiences and get your content in front of tons of people. In my first month as a blogger, Pinterest Group boards were the largest source of my traffic and helped drive over 3,000 people to my website. Pretty incredible, right? There’s a lot to learn about group boards – way more than I can share in this post. To get started with Group Boards read: The Ultimate Guide to Pinterest Group Boards. Then sign up for my free Traffic Masterclass where I talk more about the power of group boards.
30. Join Tailwind Tribes
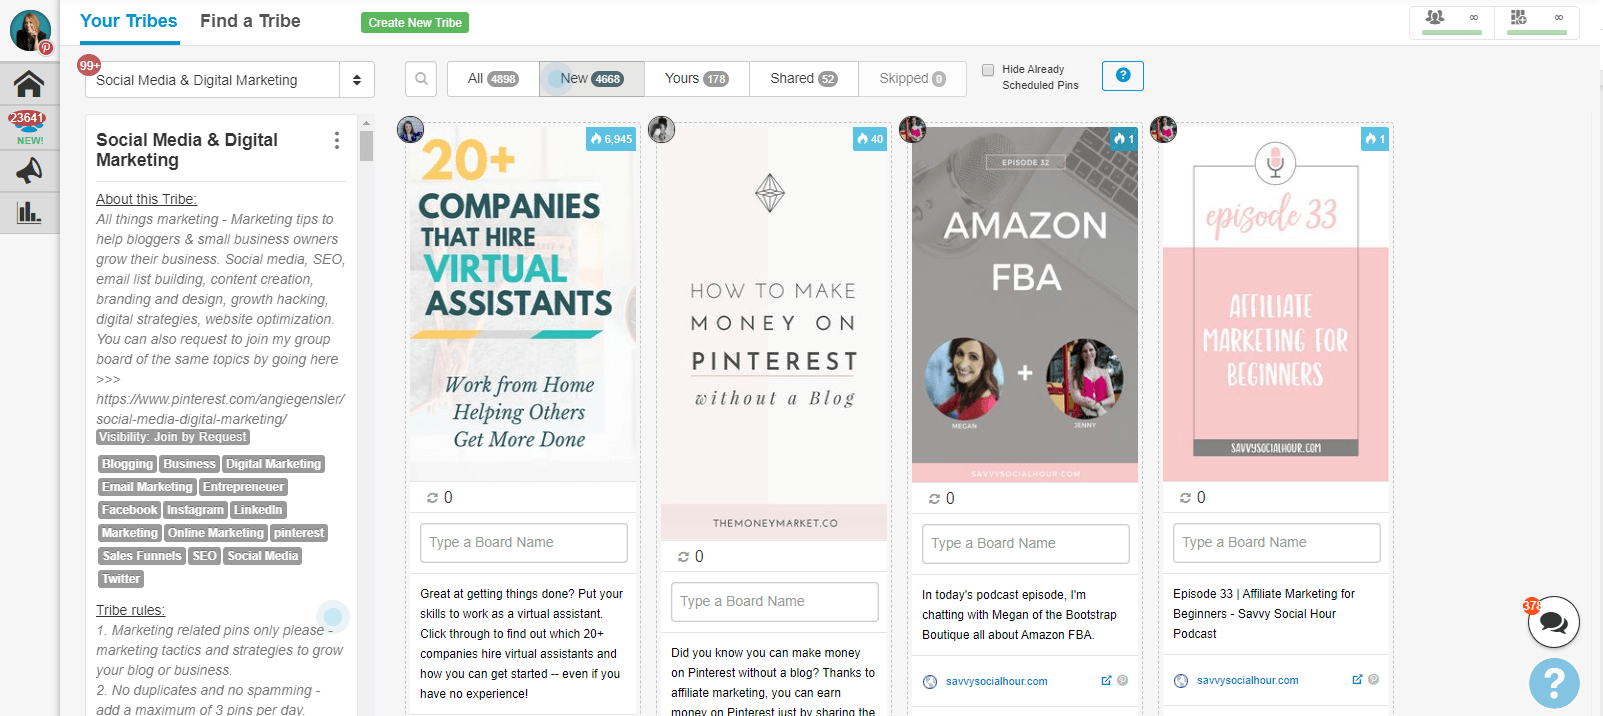
Tribes is a tool created by Tailwind to help bloggers and marketers connect and share one another’s content. Tribes operate very similar to group boards, but they are much more effective. I like to describe Tribes as group board on steroids. There is no other traffic strategy that comes close to working as well as Tribes. To get started, you need to create a Tailwind account. You can get started with a free trial and receive a $15 credit by using my affiliate link. Then read How to use Tailwind Tribes (And Grow Your Traffic) for a quick guide on how to get started.
31. Run a Promoted Pin Campaign
Promoted Pins are paid ads on Pinterest. Promoted Pins look just like regular Pins in the news feed and they’re a great way to boost your content. Promoted Pins are much more affordable than Facebook ads, and they tend to produce better results. In fact, 1 out of 2 people have made a purchase after seeing a Promoted Pin. (source) I have a special Promoted Pin strategy I use to help my content take off on Pinterest and it only costs $5 – 10 for each new piece of content I create. You can learn exactly how to replicate my strategy as well as how to build out your first Promoted Pin campaign in my Pinterest Traffic Trifecta course.
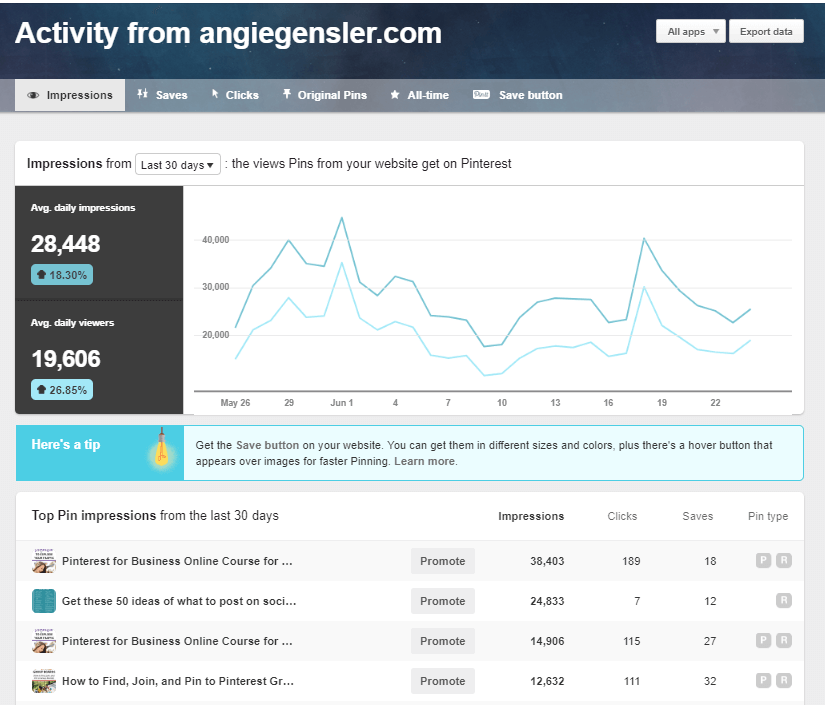
32. Use Pinterest Analytics Strategically
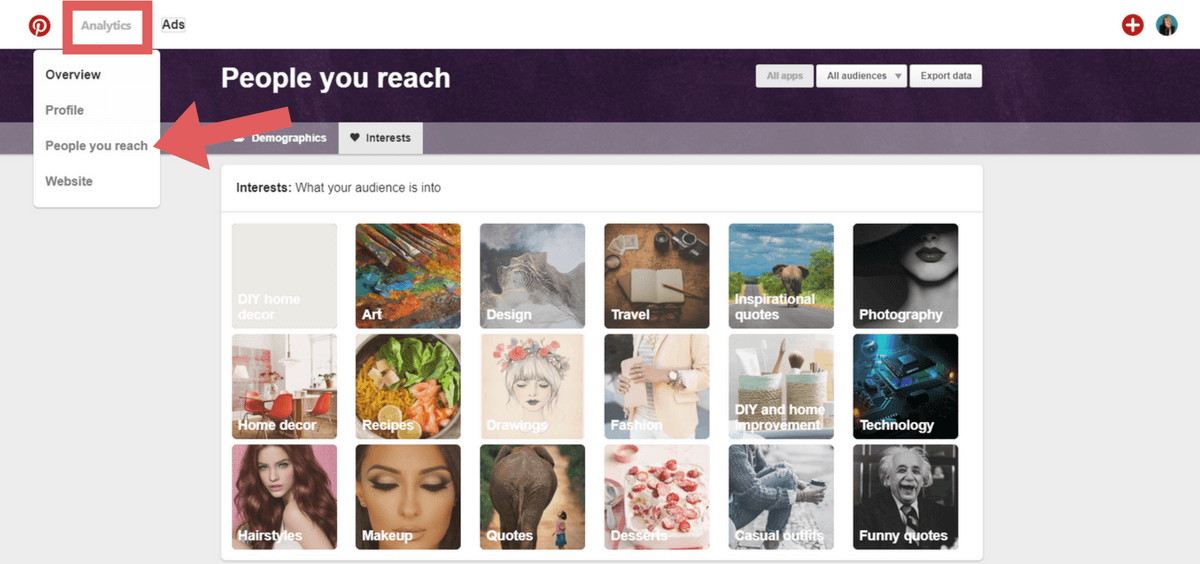
Your Pinterest Business account comes with analytics which can be a great source of insight. Don’t overlook your analytics! My favorite feature within Pinterest analytics is the “People You Reach.” Pinterest gives you a snapshot of your audience, including their interests, boards with lots of your Pins, and brands your audience also follows. You can then use this insight to reach out to other influencers, or tailor your content to appeal to your audience’s interests.
32. Use Google Analytics Strategically

If you don’t have Google Analytics installed on your website, stop what you’re doing and go install it now! Google Analytics is a free tool that provides in-depth information on how people use your website. You can use it to track where your traffic is coming from, what they’re reading, and what actions they’re taking on your site. For the sake of Pinterest marketing, use Google Analytics to track which blog posts are driving the most traffic from Pinterest. Identify your top 10 posts and then optimize them. Make sure you have content upgrades, opt-in forms, and strong CTAs within each post as well as internal links to keep readers on your website longer.
34. Optimize Your Blog for Mobile
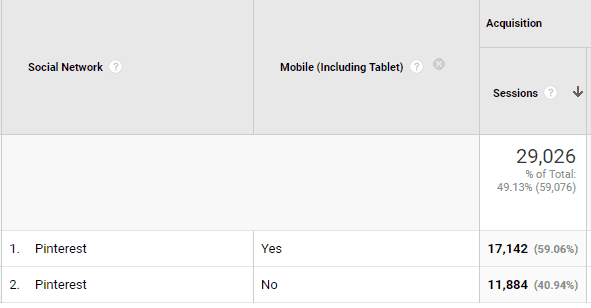
Pinterest users primarily use the platform from a mobile device, which means your blog needs to be mobile-friendly. Nearly 60% of my Pinterest traffic comes from a mobile device. I know this from my Google Analytics. Imagine if my website wasn’t mobile responsive and it was a terrible experience for 60% of my readers. If you want to keep Pinterest users from bouncing and engaged on your site, you need to make sure it’s optimized for mobile devices. An easy way to test this is to visit your site from your phone and your tablet. Make sure the experience is seamless and easy across all devices.
35. Install the Save Button on Your Website
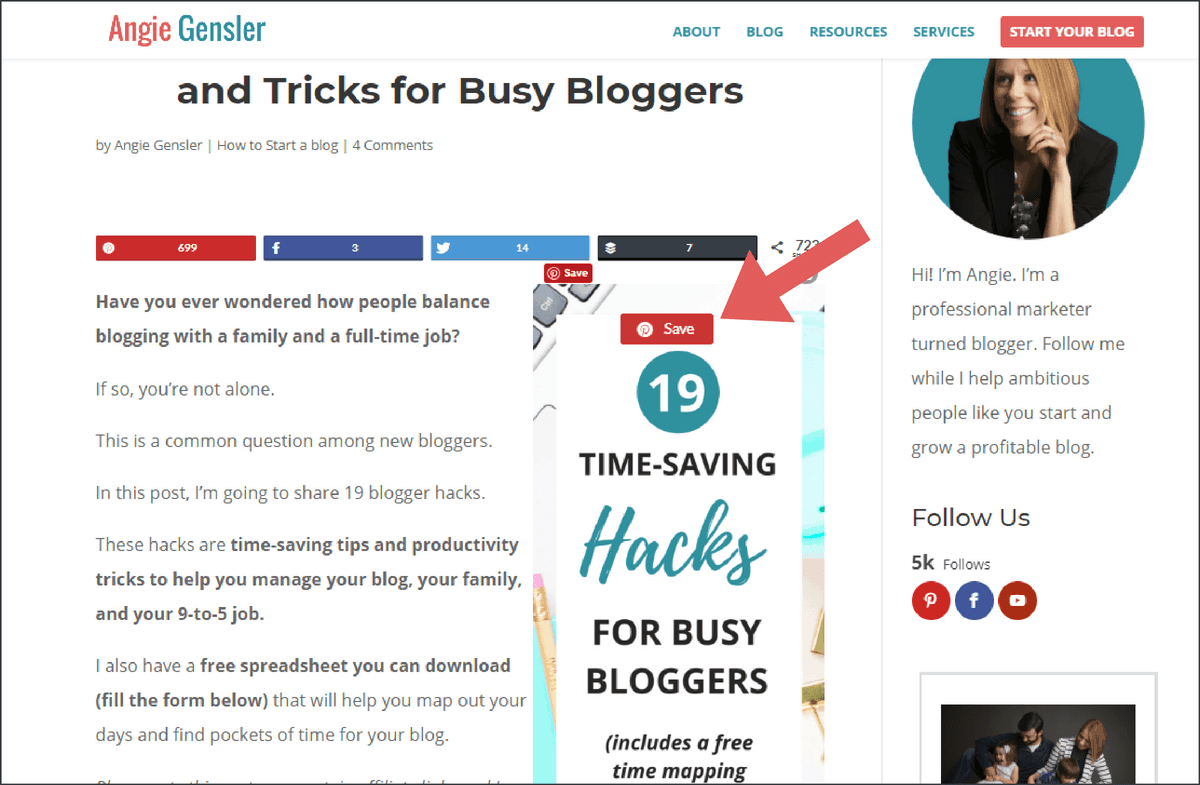
If you want other people to share your content on Pinterest, you need to make it as easy as possible for them. The easiest way is to have the Pinterest “SAVE” button installed on your website. All you do is add a simple line of code to your website and it makes every image on your site easy to Pin! When someone hovers over an image with their mouse the red Save button will appear, allowing them to save that image directly to their Pinterest account. You can get details on the Save button and instructions on how to install it here.
36. Encourage Your Audience to Follow You on Pinterest
If you want to grow your Pinterest account, you need to let people know about your account and ask them to follow you. Here are a few suggestions:
- Add a Pinterest follow button on your website.
- Include a call-to-action in relevant blog posts asking your readers to follow you on Pinterest.
- Include a Pinterest follow button at the bottom of your marketing emails.
- Occasionally ask your email subscribers to follow you on Pinterest.
- Share posts on your other social media channels asking your followers to also follow you on Pinterest.
- Include a link to follow you on Pinterest in your social media bios.
37. Ask Readers to Share on Pinterest
Probably the most overlooked (and most impactful) Pinterest marketing tip is to simply ask your readers to share your blog posts on Pinterest. At the end of each post include something along the lines of, “if you enjoyed this post, it would mean the world to me if you shared it on Pinterest or your other favorite social network.”
Next Steps
Now that you’ve read all 37 brilliant Pinterest marketing tips, I want to make sure you have everything you need to take action and implement the tips. Don’t forget to download the free checklist of all 37 brilliant Pinterest marketing tips. You can use this checklist as your personal roadmap to increase your website traffic from Pinterest.
Conclusion
I can’t think of a better way to end this post then to follow my own advice and humbly ask you to please share this article on Pinterest. It would mean the world to me if you helped me share this blog post with as many people as possible. I would also love to hear from you! If you have any questions or feedback, let me know in the comments below.